Complete User Registration System Using Php

As a dedicated front-end developer, I am passionate about crafting immersive and user-friendly digital experiences.
With a keen eye for design and proficiency in HTML, CSS, and JavaScript, I specialize in translating creative concepts into responsive and visually appealing websites.
My commitment to staying abreast of industry trends and technologies allows me to create dynamic and engaging user interfaces.
Whether optimizing for mobile responsiveness or ensuring cross-browser compatibility, I bring a meticulous approach to every project.
With a strong foundation in front-end frameworks like React and Angular, I thrive on transforming ideas into seamless, interactive, and aesthetically pleasing web applications that leave a lasting impression on users."
Hey Guys, I hope you are all fine, I’ve made a Complete User Registration System Using Php and Mysql Database tutorial for you. You will learn How to use Php and Mysqli to build the Login and User Registration System in Php and Mysqli.
I made many tutorials on this topic, but I used a very simple method to build a User Registration System Using Php. When I learned many new things, then I decided to make a tutorial and share it.
So, I’ve made a video tutorial on this topic, you will learn many new things that are very helpful to you. Once you learn that, then you will use any application in Php.
Why User Login and Registration System in Php important for any application, guys If you are using Facebook or YouTube, those are the largest web applications. let’s see the example of the Login System, you can’t access Facebook directly, you need to create an account and then log in the Facebook.
Once you logged in to Facebook, then you will be able to see your personal details and you can use Facebook All the features. Let’s see another example like YouTube, If you are watching the video without login, you can do that, but you can’t subscribe to the channel, and you can’t write the comment on any videos as want.
You May Also Like:
So, you can use the login and registration system using Php to assign the features that the feature user will be able to use on your website after creating an account or you can use assign limited features to your website visitors.
I hope you can understand that. So, let’s get started to understand How to make a Complete User Registration System using Php and MySQL databases.
Complete User Registration System Using PHP and MySQL Database
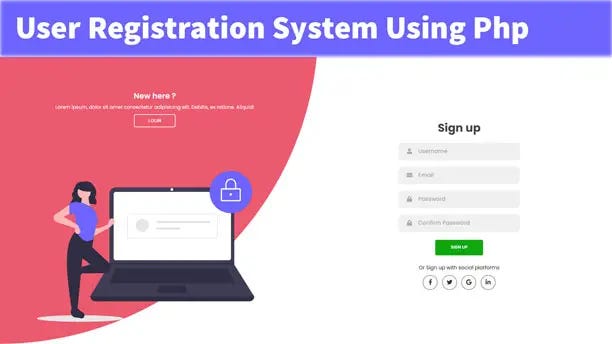
First of All, we need to design the login and registration form, you can use different technologies such as HTML/CSS or Bootstrap to design the login and registration form.
I’m going to share with you the best Login and Registration Form that is built in HTML/CSS3, you can use that without writing a code.
Here is a step-by-step usage of converting an HTML template into PHP also you need to manage that with help of Php. I’m going to share with you each code below, you need to follow that. here is the index.php file usage on this application, you need to make the header.php and also make footer.php
<!DOCTYPE html>
<html lang="en">
<head>
    <meta charset="UTF-8" />
    <meta name="viewport" content="width=device-width, initial-scale=1.0" />
    <script
        src="https://kit.fontawesome.com/64d58efce2.js"
        crossorigin="anonymous"
    ></script>
    <link rel="stylesheet" href="style.css" />
    <title>Sign in & Sign up Form</title>
</head>
<body>
<div class="container">
  <div class="forms-container">
    <div class="signin-signup">
        <form method="post" class="sign-in-form">
            <h2 class="title">Sign up</h2>
            <div class="input-field">
                <i class="fas fa-user"></i>
                <input type="text" placeholder="Username" name="username" />
            </div>
            <div class="input-field">
                <i class="fas fa-envelope"></i>
                <input type="email" placeholder="Email" name="email"  />
            </div>
            <div class="input-field">
                <i class="fas fa-lock"></i>
                <input type="password" placeholder="Password" name="password"  />
            </div>
            <div class="input-field">
                <i class="fas fa-lock"></i>
                <input type="password" placeholder="Confirm Password" name="cpassword"  />
            </div>
            <input type="submit" class="btn" value="Sign up" name="btn_register" />
            <p class="social-text">Or Sign up with social platforms</p>
            <div class="social-media">
                <a href="#" class="social-icon">
                    <i class="fab fa-facebook-f"></i>
                </a>
                <a href="#" class="social-icon">
                    <i class="fab fa-twitter"></i>
                </a>
                <a href="#" class="social-icon">
                    <i class="fab fa-google"></i>
                </a>
                <a href="#" class="social-icon">
                    <i class="fab fa-linkedin-in"></i>
                </a>
            </div>
        </form>
    </div>
  </div>
<div class="panels-container">
    <div class="panel left-panel">
      <div class="content">
        <h3>New here ?</h3>
        <p>
          Lorem ipsum, dolor sit amet consectetur adipisicing elit. Debitis,
          ex ratione. Aliquid!
        </p>
        <button class="btn transparent" id="sign-up-btn">
            <a href="login.php" style="text-decoration: none; color: white;">Login</a>
        </button>
      </div>
      <img src="img/login.svg" class="image" alt="" />
    </div>
    <div class="panel right-panel">
      <div class="content">
        <h3>One of us ?</h3>
        <p>
          Lorem ipsum dolor sit amet consectetur adipisicing elit. Nostrum
          laboriosam ad deleniti.
        </p>
        <button class="btn transparent" id="sign-in-btn">
          Sign in
        </button>
      </div>
      <img src="img/signup.svg" class="image" alt="" />
    </div>
  </div>
</div>
<script src="app.js"></script>
</body>
</html>
Once you download the template, then you need to make a database and table, in the video, I’ve made more than 04 columns. You can use the same thing because you will create the same application here is the query of MySQL, you can use that.
CREATE TABLE user_bio
(
id INT(11) UNSIGNED AUTO_INCREMENT PRIMARY KEY,
username VARCHAR(255) NOT NULL,
email VARCHAR(255) NOT NULL,
password VARCHAR(255),
)
once you made the table inside the database, then you need to make the connection between Php and MySQL database. I’ve mentioned below the code that helps you to make a connection in Php and MySQLi databases.
<?php

$con  = mysqli_connect('localhost','root','','urs');
    if(!$con)
    {
        echo " Database Connection Error";
    }
?>
Once you made the connection between php and MySQLi database, then you will be able to make a communication with the database. So, Let’s start to store the record inside the database.
Let’s start to validate the registration form, but validation we need to set up of validation function, that helps users to display the messages on the page.
So, I’m going to share with you How to make Session messages that help you to display messages on any page you want. So, Let’s understand that, you need to make a functions.php file, then you need to use the session_start() function that helps you to manage the session messages here is the code of the set session message.
<?php
    session_start();
    require_once 'db.php';
// Set Session Message
    function set_message($msg)
    {
        if(!empty($msg))
        {
            $_SESSION['MESSAGE']=$msg;
        }
        else
            {
                $msg = '';
            }
    }
?>
Once you made the above function namely set_message(), then you need to make another function that helps you to display session messages. here is code of the display_function().
// display Session Message
function display_message()
{
    if(isset($_SESSION['MESSAGE']))
    {
        echo $_SESSION['MESSAGE'];
        unset($_SESSION['MESSAGE']);
    }
}
After creating both functions inside the functions.php file, then you will be able to use Session Message to display the Message. So, Let me show you how you can display the session messages. Before displaying the session messages you need to work on the registration form.
Basically, We will store the data in the database and also we will display the validation message with the help of Session Messages. So, You need to make a function namely register_user(). Then you need to get the all input text field data and then store them into variables.
function register_user()
{
    global $con;
    if(isset($_POST['btn_register']) || $_SERVER['REQUEST_METHOD']=='POST')
    {
        $username = mysqli_real_escape_string($con,$_POST['username']);
        $email = mysqli_real_escape_string($con,$_POST['email']);
        $password = mysqli_real_escape_string($con,$_POST['password']);
        $cpassword = mysqli_real_escape_string($con,$_POST['cpassword']);
    }
}
Once you have gotten the data from input text fields and stored the data into variables, then you need to use validation such as empty fields. If anyone’s field is empty then display the session message, below I’ve mentioned the code, you need to use inside the register_user() function after if Curly brackets.
if(empty($username) || empty($email) || empty($password) || empty($cpassword))
{
    $error = "<div> Please Fill in the Blanks</div>";
    set_message($error);
}
Once you assign the empty fields validation, then you need to call the register_user() function inside the index.php file. I’ve shared the below code that helps you to understand that you need to paste the below-mentioned code before starting HTML syntax.
<?php
    require_once 'config/functions.php';
    register_user();
?>
Once you include the functions.php file, then you will be able to use functions inside the index.php file. When you display the session messages you need to call display_message() function inside the index.php file. You can use the display_message() function anywhere you want to display the session Message.
<div class="container">
  <div class="forms-container">
    <div class="signin-signup">
        <form method="post" class="sign-in-form">
            <h2 class="title">Sign up</h2>
            <?phpif(isset($_SESSION['MESSAGE']))
                {
                    display_message();
                }
            ?>
So, I hope you have understood well usage of functions inside the index.php file. I’ve to share the below-mentioned code which uses for validation and also stores the record inside the database. You need to that after empty fields if statement you need to use below code. Note below-mentioned code is use inside the register_user() function
else
        {
            $query = "select * from user_bio where username='$username'";
            $result = mysqli_query($con,$query);
if(mysqli_num_rows($result))
            {
                $error = "<div> User Name Already Exists.</div>";
                set_message($error);
            }
            else
                {
                    $query = "select * from user_bio where email='$email'";
                    $result = mysqli_query($con,$query);
                    if(mysqli_num_rows($result))
                    {
                        $error = "<div> Email Already Exists.</div>";
                        set_message($error);
                    }
                    else
                        {
                            $hash = md5($password);
                            $sql = "insert into user_bio(username,email,password) values('$username','$email','$hash')";
                            $data = mysqli_query($con,$sql);
                            if($data)
                            {
                                $error = "<div> Record Successfully Registered : ) </div>";
                                set_message($error);
                            }
                            else
                                {
                                    $error = "<div> Something is Wrong; </div>";
                                    set_message($error);
                                }
                        }
                }
        }
}
So, you can use the same thing to make the login_user() function and use the same way to get the data from input text fields, then you need to match the data with the database, below mentioned code is all about login users.
function login_user()
   {
    global $con;
    if(isset($_POST['btn_login']) || $_SERVER['REQUEST_METHOD']=='POST')
    {
        $username = mysqli_real_escape_string($con,$_POST['username']);
        $password = mysqli_real_escape_string($con,$_POST['password']);

      if(empty($username)  || empty($password) )
        {
            $error = "<div> Please Fill in the Blanks</div>";
            set_message($error);
        }
        else
        {
            $query = "select * from user_bio where username='$username' or email='$username'";
            $result = mysqli_query($con,$query);
            if($row=mysqli_fetch_assoc($result))
            {
                $db_pass = $row['password'];
                if(md5($password)==$db_pass)
                {
                    header("location: user/index.php");
                    $_SESSION['ID']=$row['id'];
                    $_SESSION['EMAIL']=$row['EMAIL'];
                }
                else
                    {
                        $error = "<div> Please Enter Valid Password</div>";
                        set_message($error);
                    }
            }
            else
                {
                    $error = "<div> Please Enter Valid UserName or Email</div>";
                    set_message($error);
                }
        }
    }
}
Here is the login page code, you need to follow that, then you will be able to see the same thing with two input text fields. And Also you can see functions that help you to display the message and also perform the operation.
<?php
    require_once 'inc/header.php';
    require_once 'config/functions.php';
    login_user();
?>
<div class="container">
    <div class="forms-container">
        <div class="signin-signup">
            <form method="POST" class="sign-in-form">
                <h2 class="title">Sign in</h2>
                <?phpif(isset($_SESSION['MESSAGE']))
                {
                    display_message();
                }
                ?>
                <div class="input-field">
                    <i class="fas fa-user"></i>
                    <input type="text" placeholder="Username or Email" name="username" />
                </div>
                <div class="input-field">
                    <i class="fas fa-lock"></i>
                    <input type="password" placeholder="Password" name="password" />
                </div>
                <input type="submit" value="Login" name="btn_login" class="btn solid" />
                <p class="social-text">Or Sign in with social platforms</p>
                <div class="social-media">
                    <a href="#" class="social-icon">
                        <i class="fab fa-facebook-f"></i>
                    </a>
                    <a href="#" class="social-icon">
                        <i class="fab fa-twitter"></i>
                    </a>
                    <a href="#" class="social-icon">
                        <i class="fab fa-google"></i>
                    </a>
                    <a href="#" class="social-icon">
                        <i class="fab fa-linkedin-in"></i>
                    </a>
                </div>
            </form>
        </div>
    </div>
    <div class="panels-container">
        <div class="panel left-panel">
            <div class="content">
                <h3>New here ?</h3>
                <p>
                    Lorem ipsum, dolor sit amet consectetur adipisicing elit. Debitis,
                    ex ratione. Aliquid!
                </p>
                <button class="btn transparent" id="sign-up-btn">
                    <a href="index.php" style="text-decoration: none; color: white;">Singup</a>
                </button>
            </div>
            <img src="img/login.svg" class="image" alt="" />
        </div>
        <div class="panel right-panel">
            <div class="content">
                <h3>One of us ?</h3>
                <p>
                    Lorem ipsum dolor sit amet consectetur adipisicing elit. Nostrum
                    laboriosam ad deleniti.
                </p>
                <button class="btn transparent" id="sign-in-btn">
                    <a href="index.php" style="text-decoration: none; color: white;">Singup</a>
                </button>
            </div>
            <img src="img/signup.svg" class="image" alt="" />
        </div>
    </div>
</div>
<?php require_once 'inc/footer.php';?>
once the user login your application then who will redirect with user/index.php. The user is a directory inside the directory have page. So, You can use the below-mentioned code that helps you to display the simple page, inside the page, you will be able to see the username, email, and also the logout button.
<?php

require_once '../config/functions.php';
    require_once '../config/db.php';
    if(!isset($_SESSION['ID']) && !isset($_SESSION['EMAIL']))
    {
        header("location: ../login.php");
    }
    $id = $_SESSION['ID'];
    $query = "select * from user_bio where id='$id'";
    $result = mysqli_query($con,$query);
    $row = mysqli_fetch_assoc($result);
?>
<!doctype html>
<html lang="en">
<head>
    <meta charset="UTF-8">
    <meta name="viewport"
          content="width=device-width, user-scalable=no, initial-scale=1.0, maximum-scale=1.0, minimum-scale=1.0">
    <meta http-equiv="X-UA-Compatible" content="ie=edge">
    <link rel="stylesheet" href="css/bootstrap.css">
    <title>User Registration System in Php</title>
</head>
<body class="bg-light">
        <div class="container">
            <div class="row">
                <div class="col-lg-6 m-auto">
                    <div class="card mt-5">
                        <div class="card-header bg-dark text-white">
                            <h3>User Registration System</h3>
                        </div>
                        <div class="card-body">
                            <p>User Name: <span><?php echo $row['username'] ?></span></p>
                            <p>User Email: <span><?php echo $row['email'] ?></span></p>
                        </div>
                        <div class="card-footer">
                            <a href="logout.php" class="btn btn-danger float-end">Logout</a>
                        </div>
                    </div>
                </div>
            </div>
        </div>
</body>
</html>
Finally, you need to make simple code that helps you to log out the user with your application. I’ve mentioned the below code, you need to use that to log out the user with your application.
<?php
session_start();
session_unset($_SESSION['ID']);
session_unset($_SESSION['EMAIL']);
session_destroy();
header("location: ../login.php");
?>
User Registration System Using Php
I’ve made the complete video on this topic, you need to watch that to learn How to make a User Registration System using Php and MySQLi. inside the video, you will learn step by step how to manage the folder structure and you will learn how to manage the codes.
Guys, If you are a beginner, you need to know how to manage the codes.
The above is all about the User Registration System Using Php and MySQL databases. I hope you like that if you face any problems you need to watch the complete video tutorial.
Once you watched the complete video, then I hope you won’t face any problems with to login and registration system in PHP.


