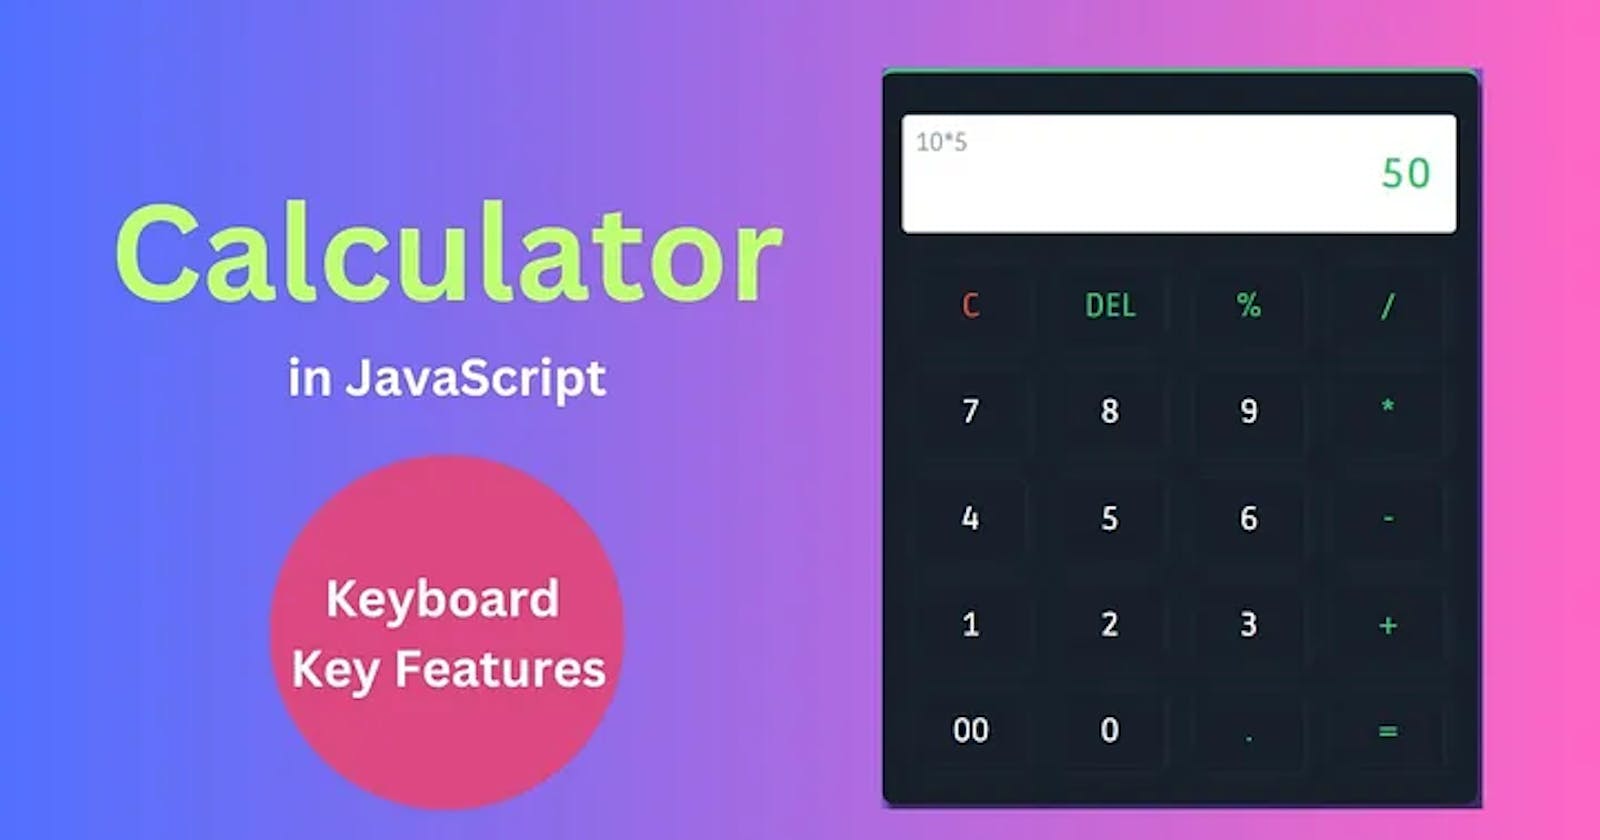
Want to learn how to make a calculator in Javascript? In this article, you will learn all the basics of HTML, CSS, and JavaScript coding to create your calculator! Welcome to my blog! Are you curious about how to make a calculator in JavaScript?
Well, you’ve come to the right place! In this blog post, I’m going to show you step-by-step how to make a calculator using JavaScript. So get ready to get your coding on and let’s make a calculator with JavaScript!

Learning how to create a calculator using JavaScript can be an exciting and rewarding experience. JavaScript is a powerful scripting language that allows you to write powerful and fast applications.
With the right combination of coding, you can make wonderful programs that allow users to perform basic mathematical functions. Creating a calculator using JavaScript will teach you the basics of using the language and also provide you with an opportunity to gain valuable coding skills.
In this tutorial, we will learn how to create a basic calculator in JavaScript. We will be creating a simple form wherein the user can input two numbers and an operator which will then perform an arithmetic operation on those numbers according to what is specified by the operator. Once the calculation is performed, it will be displayed as output in our web page for our users’ convenience.
Understanding JavaScript
JavaScript is a high-level programming language that is used to create dynamic websites and applications. It is an essential skill for any programmer looking to build web-based applications and forms the foundation of so many modern technologies.
To make a calculator in JavaScript, you need to understand the basics of the language and know how variables and functions interact. Variables are pieces of data that can be manipulated from within your program. They come in several varieties, each offering different types of storage and control structures.
These variable types include strings, numbers, booleans, arrays and objects. Each variable type has unique capabilities for maintaining data such as user input or mathematical operations.
Functions are blocks of code that can be repeatedly used to perform specific tasks. By breaking down their programs into distinct functions, developers can optimize their code’s organization while also ensuring its accuracy and efficiency. In addition to JavaScript’s built-in functions, developers can create custom ones tailored to their specific needs or requirements.
To build a calculator in JavaScript, you will use variables to store intermediate calculations like user inputs or function calls; utilize functions for performing operations like addition or multiplication; make use of loops for iterating through values; and incorporate conditional statements when deciding what action your program should take next based on user input or other factors. Once you have mastered these basic concepts, you can easily construct powerful web applications!
How to Make A Calculator Using JavaScript
If you want to create a calculator using JavaScript, there are a few things that you will need to do. First of All, you need to design a calculator that is help you to display data on your web page.
I’ve used HTML, and CSS to design the calculator, you can use Bootstrap to design the calculator If you have knowledge of Bootstrap. So, Let’s see the code of the HTML Page.
How To Make A Calculator In JavaScript
Hey Guys, I’ve shared each code that is used to make a calculator in JavaScript. I also made a video tutorial on this topic, So, You can watch it. I’ve explained everything step by step practically.
The index.html page has a basic HTML structure and some HTML tags to display the data on the web page. Also inside the page are CSS and JavaScript links.
<!DOCTYPE html>
<html lang="en">
  <head>
    <meta charset="UTF-8" />
    <meta http-equiv="X-UA-Compatible" content="IE=edge" />
    <meta name="viewport" content="width=device-width, initial-scale=1.0" />
    <title>Calculator in JavaScript</title>
    <link rel="stylesheet" href="css/style.css" />
  </head>
  <body>
    <div class="container">
      <div class="wrapper">
        <div class="screen">
          <div class="top_txt">
            <p class="dummy"></p>
          </div>
          <div class="user-display">
            <input type="text" class="result" />
          </div>
        </div>
        <div class="cal-btn">
          <ul>
            <li class="clr">C</li>
            <li class="btns">DEL</li>
            <li class="btns">%</li>
            <li class="btns">/</li>
            <li>7</li>
            <li>8</li>
            <li>9</li>
            <li class="btns">*</li>
            <li>4</li>
            <li>5</li>
            <li>6</li>
            <li class="btns">-</li>
            <li>1</li>
            <li>2</li>
            <li>3</li>
            <li class="btns">+</li>
            <li>00</li>
            <li>0</li>
            <li class="btns">.</li>
            <li class="btns">=</li>
          </ul>
        </div>
      </div>
    </div>
    <script src="js/script.js"></script>
  </body>
</html>
So, Once you do that, then you need to style it with the help of CSS, I’ve mentioned the code below, you can check it out Now.
@import url("https://fonts.googleapis.com/css2?family=Poppins:wght@400;500;600&family=Ruda:wght@400;600;700&display=swap");

* {
  padding: 0;
  margin: 0;
  box-sizing: border-box;
  font-family: "Ruda", sans-serif;
}

.container {
  display: flex;
  justify-content: center;
  align-items: center;
  min-height: 100vh;
  background-color: rgb(63, 94, 251);
  background: radial-gradient(
    circle,
    rgba(63, 94, 251, 1) 0%,
    rgba(252, 70, 107, 1) 100%
  );
}

.wrapper {
  background: #17202a;
  width: 450px;
  padding: 1rem;
  border-top: 4px solid #2ecc71;
  border-radius: 10px;
  box-shadow: 5px 10px 3px rgba(0, 0, 0, 0.5);
}

ul {
  list-style-type: none;
  display: flex;
  flex-wrap: wrap;
  justify-content: space-between;
}

ul li {
  font-size: 1.5rem;
  width: 20%;
  text-align: center;
  padding: 1rem 0.8rem;
  cursor: pointer;
  margin: 0.6rem;
  border-radius: 10%;
  box-shadow: 1px 0px 10px #212f3d;
  color: #fff;
  transition: all 0.3s ease-in-out;
}

ul li:active {
  transform: scale(1.2);
}

.wrapper input {
  width: 100%;
  margin: 1rem 0;
  padding: 1.5rem 1rem;
  text-align: right;
  outline: none;
  border: 1px solid #ddd;
  border-radius: 5px;
  letter-spacing: 2px;
  font-weight: 600;
  font-size: 2rem;
}

.screen {
  position: relative;
}

.top_txt {
  position: absolute;
  top: 25px;
  left: 10px;
  color: #95a5a6;
}

.dummy {
  font-size: 1.2rem;
}

.clr {
  color: #e74c3c;
}

.btns {
  color: #2ecc71;
}
Once you do that, then you are able to see Basic Calculator designed using HTML and Also CSS3. Then the next thing you need to add functionality to perform the operations such as Addition, Subtraction, Multiplication, and also Division.
So, you need to use JavaScript to add the functionalities, So, Let’s see the JavaScript code to perform the operations.
let result = document.getElementById('result');
let nums = document.querySelectorAll('li');

for(let i=0; i<nums.length; i++){
  // console.log(nums[i].innerHTML);

  result.value.innerHTML;

  nums[i].addEventListener('click',function(){
    // console.log(nums[i].innerHTML);
    let getvalue = document.getElementById('result').value;

    if(nums[i].innerHTML=="="){
      result.value = eval(result.value)
    }
    else{

      if(nums[i].innerHTML=="C" || nums[i].innerHTML=="CE"){
        result.value = "";
      }

      else{
        result.value += nums[i].innerHTML;
      }

      if(nums[i].innerHTML=="Del"){
        result.value=getvalue.slice(0,-1);
      }

    }
  })
}
Conclusion
In this article, we looked at how to make a calculator in JavaScript. We started by creating the basic structure of our calculator using HTML and CSS.
You May Also Like:
Then, we added interactivity to our calculator using JavaScript. Finally, we added some basic math functionality to our calculator. So, I hope this tutorial is helpful and beneficial for you. please share it with your friends on the social sharing websites.
